
I'm sorry that I haven't posted for a while, but we have been in the midst of the kitchen remodel that would not end. We went from a classic late '70s oak paneled kitchen with failing appliances to a modern kitchen that is as close to my dream kitchen as we could get given space limitations.

Our old kitchen in all it's "Classic Oak" splendor
Having never done anything close to this before i somehow thought I'd be able to schedule contractors tightly and get this done in a week or two. We are four full weeks in and still need paint, but at least everything is useable now. Our fast food binge is over, and tonight we'll be cooking dinner in our kitchen for the first time.

The kitchen as it stood on the first day of demolition

The kitchen after demolition was done. We stripped it down to the walls!
Our first step after removing all of the cabinets and appliances was to make some changes to the ceiling and walls. We removed the soffits above the old upper cabinets across the peninsula and above the sink, and closed in the doorway from the hall to give us more wall and counter space later. We wanted to remove the soffit that was above the stove, but there was too much electrical and plumbing inside it to take it out.
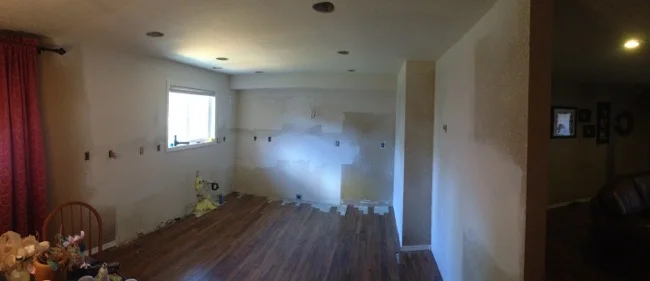
As you can see we filled in the flooring where the peninsula used to be, and this picture was taken after the drywall was completed.
We measured and designed the kitchen using the great IKEA Home Planner 3D tool. It took a few months of planning and design before we even started demolition to decide on what we wanted it to look and feel like. Then we called in the professionals to measure again to make sure our numbers were correct before finalizing the order of our cabinets and appliances. Even after that double-checking a mistake by the folks measuring left us with a cabinet on one wall we didn't have room for and our refrigerator 10 inches farther into our dining room than we wanted.

Piles of cabinets and appliances waiting for installation day.
Even with the peninsula in our old kitchen we had less than ten feet of total counter space, now we have fifteen. We added storage for pots and pans under the cooktop by separating the oven and placing it in the cabinet with the microwave, and this also allowed for more working room over the cooktop keeping that wall clean. After three days of cabinet installation, another day for plumbing, and a long day installing appliances and finishing the electrical with the help of a very good friend that happens to be an electrician, here is where we are now:

Left side of kitchen

The center wall. Once paint is finished this wall will also feature open shelving for spices, rails for utensils, and magnetic knife rails so we can do away with the three knife racks our counter used to house.

The right wall of our kitchen. Cabinets are 84" tall and feature plenty of room for pantry and dish ware.
It was a long journey, but we can see the end now. Special thanks to the folks at IKEA, Kitchen Helpers who did the install, and Mark Rygh for his help with appliances and electrical.
I'll post a follow up when we complete the painting and finishing touches, but you'll start seeing new recipes and reviews starting tonight.